Drag Drive Simulator Vehicle Customization at a Glance
Drag Drive Simulator vehicle customization is the single biggest lever most new riders overlook, and it sits at the heart of how cars and motorcycles actually feel on the strip. The Roblox title from ADV Gamers Team ships with a deep Pipe upgrade slot, multiple exhaust tiers, paint, DRL lights, indicator logic, and a wrap layer that all stack into one cohesive look and sound. Players who treat the garage as a real build system — rather than a cosmetic afterthought — consistently post faster launch times and cleaner burnout pulls, because the exhaust pipe is wired to audio, torque, and wheelie behavior in equal measure.
The reason this matters right now is that the Drag Drive Simulator on Roblox page shows the title pushing past 561 million total visits and 2.9 million favorites as of September 2026, and the community's customization guides are exploding. Every Bike and Car in the dealership supports a full mod chain, so understanding the slot logic is more valuable than grinding one more shift at the Barista. This guide walks through the full Pipe system, exhaust tiers, swap procedure, and the most popular community builds so you can finish this read with a concrete plan for your next garage session.
The Pipe Upgrade Slot and How It Works in Drag Drive Simulator
The Pipe upgrade slot is the single most important component in Drag Drive Simulator how to customize cars because it carries both visual identity and mechanical impact. When you open a vehicle's customization menu, the Pipe slot appears alongside DRL, Indicator, Paint, Wrap, Suspension, Rims, and Kickstand slots. Selecting Pipe opens a catalog of exhaust variants, each with a unique sound profile, a top-end torque curve, and a wheelie tendency. The slot is a free swap — you do not consume the original pipe, you simply replace it — which means experimenting with multiple Drag Drive Simulator exhaust pipe options costs you nothing but a few seconds in the garage.
What the Pipe Slot Actually Controls
The Pipe slot is not purely cosmetic. Community testing on rides like the Stylo 160cc and the Yamaha Aerox shows that swapping from the stock quiet pipe to a high-flow variant raises the audible RPM ceiling, sharpens the launch sound, and can pull the front wheel up a touch earlier off the line. Conversely, low-profile pipes deliver a deeper idle note and a more planted launch that experienced riders prefer for technical circuits like Sentul and Mandalika.
| Pipe Slot Behavior | What Happens in Game | Who It Suits |
|---|---|---|
| Stock quiet pipe | Neutral idle, predictable launch | First-day beginners, RP farming |
| Mid-tier street pipe | Slightly louder, mild torque bump | Daily drivers, RideGO shifters |
| High-flow racing pipe | Loud crackle, top-end pull, wheelie bias | Drag strip racers, ranked climbers |
| Event-limited pipe | Unique sound, often paired with a badge | Collectors, anomaly hunters |
Why the Pipe Comes Before Paint
Most beginners reach for paint and rims first because the visual change is instant, but a smart Drag Drive Simulator vehicle customization flow always starts at Pipe. The reason is mechanical: your launch feel, your burnout, and your wheelie tendency all derive from the pipe you have equipped. If you paint a car first and then realize the loud pipe you actually wanted is locked behind a level gate, you have wasted a paint slot that costs real in-game currency to reset. Build from the mechanical core outward — Pipe, Suspension, Rims, DRL, Indicator, Paint, Wrap — and the garage session stays efficient.
How to Change Pipe and Swap Exhaust Step by Step
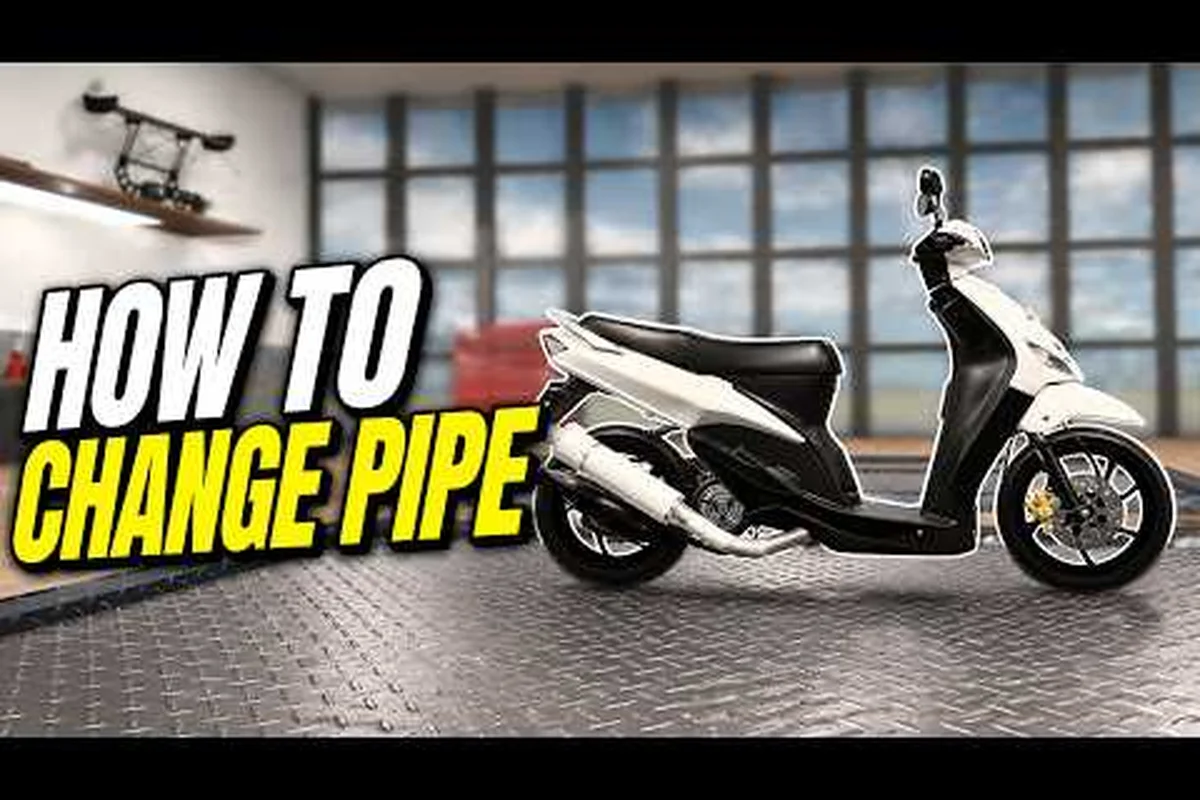
Drag Drive Simulator how to change pipe is the single most-searched customization question in the community, and the workflow is the same whether you ride a Honda Click commuter or a tuned Yamaha Aerox. The procedure lives inside the vehicle menu, which you can access from any garage spawn, dealership, or safe-house pad. The community video How to CHANGE PIPE (EXHAUST) in DRAG DRIVE SIMULATOR Roblox by Radex Tips shows the full swap motion in real time, which is useful for first-timers who want to see the menu navigation before they burn a session in-game.
The Exact Swap Procedure
-
Park your vehicle inside a garage zone or near any dealership pad — outdoor swaps do not register.
-
Open the vehicle menu with the interaction key, then select Customize.
-
Scroll to the Pipe slot, which sits in the first row of upgrade categories.
-
Pick a pipe from the available catalog; locked variants show a level or RP requirement.
-
Confirm the swap, then test launch and burnout to confirm the new sound and feel.
Drag Drive Simulator How to Change Exhaust for the First Time
If this is your first time touching Drag Drive Simulator how to change exhaust, expect the catalog to feel small at low driver level. The stock pipe is your only option for the first few hours, then mid-tier street pipes unlock around Driver Level 8-12 based on community reports, and racing-spec pipes open in the 20s. Each swap is instant, so the only real cost is the time to drive back to a garage. Players who run the RideGO job find the swap menu opens faster because they spend so much time near city spawns where the garage pad sits one block away from the pickup zone.
Drag Drive Simulator Best Exhaust Picks and Tier Comparison
The Drag Drive Simulator best exhaust question does not have one universal answer because the right pipe depends on whether you drag race, drift, ride the circuit, or just farm anomaly spawns. Community riders consistently rank the high-flow racing pipe at the top of any Drag Drive Simulator vehicle customization tier list, but mid-tier street pipes hold their own for everyday play, and event pipes offer unique sounds that you cannot get from any standard catalog. The comparison below distills what experienced players report across the Honda Click, Yamaha Aerox, Stylo 160cc, and several four-wheel platforms.
| Pipe Tier | Sound Profile | Top Speed Feel | Launch Behavior | Best Use Case | Approx. Unlock |
|---|---|---|---|---|---|
| Stock | Quiet, polite | Baseline | Neutral | Tutorial, RP farming | Default |
| Street | Mild bump, clean idle | +1-2% | Slight pull | Daily driving, RideGO | Driver Lvl 8-12 |
| Sport | Noticeable crackle | +3-4% | Sharper 0-60 | Street races, casual drag | Driver Lvl 15-20 |
| Racing | Loud, aggressive | +5-7% | Wheelie bias, fast spool | Ranked drag, Mandalika | Driver Lvl 22-30 |
| Event | Unique, themed | Varies | Varies | Collectors, badge progress | Limited windows |
Sport vs Racing Pipe in Real Drag Laps
Community drag testers report that the Sport pipe closes the gap to a Racing pipe by roughly 0.05-0.10 seconds on a quarter-mile, which is small but meaningful in Ranked Mode where wagers scale with your time delta. The Racing pipe pulls harder at the top end but costs a small amount of launch grip because the front end lifts earlier. If you ride a high-power motorcycle like the Aerox, the Racing pipe is worth the trade because you want every wheelie; if you ride a commuter Click, the Sport pipe is the better Drag Drive Simulator best exhaust pick for your daily runs because it keeps both wheels planted.
When to Skip the Top Pipe
There is a real case for keeping the Stock or Street pipe: during long anomaly hunts, the loud Racing pipe makes it harder to hear the anomaly arrival chime, which can cost you a catch. The same logic applies during stealth-heavy jobs, where the quieter the better. A mature Drag Drive Simulator vehicle customization setup actually rotates pipes by context — Racing for the strip, Street for daily, Stock for anomaly routes — and the free-swap system makes that rotation painless.
Practical Mod Build Recipes for Cars and Motorcycles
Once you understand the Pipe slot, the rest of the Drag Drive Simulator how to modify vehicles question opens up. The customization screen lets you stack DRL color, Indicator pattern, Paint, Wrap, Suspension height, Rim style, and Kickstand visibility on top of your exhaust choice. The best builds in the community are not maxed-out — they are coherent. A loud Racing pipe paired with neon underglow and a slammed suspension reads as a street build; a quiet Stock pipe with stock rims and a soft pastel paint reads as a commuter. Both work because the parts agree with each other. The same logic applies when you chase a specific outcome, like shaving tenths off a quarter mile in Drag Drive Simulator Pipe Upgrade, where swapping in a tuned header or a freer-flowing exhaust only pays off if the rest of the drivetrain — intake, tune, tires, weight — agrees with the new pipe instead of fighting it.
Sample Street Build for the Yamaha Aerox
-
Pipe: Racing tier for sharp spool and wheelie tendency.
-
DRL: White or pale blue for clean contrast against a dark wrap.
-
Indicator: Standard blink, no syncing needed for street runs.
-
Paint: Matte black or deep red to anchor the loud exhaust.
-
Wrap: Carbon-fiber accent on the tank and tail only.
-
Suspension: Mid-height for daily comfort plus a touch of stance.
-
Rims: Sport five-spoke in dark gunmetal to finish the build.
Sample Sleeper Build for the Honda Click
-
Pipe: Street tier — quiet, planted, perfect for anomaly routes.
-
DRL: Yellow or amber to match the Indicator color and read as a stock commuter.
-
Indicator: Standard, no syncing.
-
Paint: Original Click white to keep the sleeper illusion.
-
Wrap: None — the lack of customization is the point.
-
Suspension: Stock height for max stability during long shifts.
-
Rims: Stock steel wheels, no rim swap.
Drag Strip Build for Four-Wheel Platforms
Four-wheel Drag Drive Simulator vehicle customization leans harder into mechanical slots because the launches are longer. Pair a Racing pipe with a stiff Suspension preset, lightweight Rims, and a stripped visual layer — no Wrap, minimal decals, single-tone Paint. The point of a drag build is to communicate intent: the loud pipe says "I am here to race," and the clean visual says "I am not playing around." This combination is also what most ranked lobbies respond to, because players read the loud pipe as a serious opponent and sometimes over-brake into the tree.
Cross-Slot Synergy: Pipe, DRL, Indicator, and Paint
Drag Drive Simulator how to customize cars becomes a real design exercise once you start thinking about how the Pipe slot interacts with the rest of the build. A Racing pipe with a mismatched DRL color, a sticky Indicator, and a Wrap that fights the Paint reads as a beginner's mash-up; the same Racing pipe with a clean DRL, synced Indicator, and a complementary Paint reads as a curator's build. Community creators like LishiNaxe post videos like MODIF/OPREK Motor Stylo Tuned 160cc NON GAMEPASS Di DDS! that show the full slot interaction, and the takeaway is always the same — every slot should answer a question the other slots raised.
DRL and Indicator Pairings That Work
-
Loud Racing pipe + white DRL + amber Indicator = classic sport look, easy to read on the strip.
-
Street pipe + blue DRL + white Indicator = modern commuter, popular for RideGO shifts.
-
Stock pipe + yellow DRL + yellow Indicator = sleeper commuter, hides Racing-spec power under a quiet build.
-
Event pipe + themed DRL + synced Indicator = event build, useful during Independence Day or Halloween windows.
Paint and Wrap Layering Rules
The Paint slot sits under the Wrap slot in the visual stack, which means a heavy wrap can hide a great paint job. Most community builders pick the Paint first, then choose a Wrap that complements rather than covers it. A carbon-fiber wrap over a candy red paint looks clean; a busy flame wrap over the same candy red paint fights for attention and usually loses. Pair the loud pipe with a quiet visual layer and vice versa — the contrast is what makes the build read as intentional.
Drag Drive Simulator How to Modify Vehicles Without Wasting Money
Drag Drive Simulator how to modify vehicles efficiently comes down to three rules: never paint a car before you have settled on a Pipe, never Wrap a paint you might swap later, and always test a new Pipe in a quiet area before committing to it in ranked play. Each rule sounds obvious in isolation, but the community's most common beginner mistake is to burn currency on a Paint reset because they changed their mind on the pipe after the visual layer was already set. The free Pipe swap is your biggest financial protection; lean on it.
Spending Priorities by Player Stage
| Player Stage | Best First Spend | Second Spend | Avoid Until Later |
|---|---|---|---|
| Day 1-3 | Stock pipe, free paint | None | Racing pipe (locked) |
| Driver Lvl 8-12 | Street pipe swap | Light DRL change | Heavy wrap |
| Driver Lvl 15-20 | Sport pipe | Rim upgrade | Event pipe chase |
| Driver Lvl 22-30 | Racing pipe | Full DRL/Indicator sync | Constant resets |
| Endgame | Event pipe collection | Motorshow build recipes | Cosmetic-only play |
Saving Money With the Free Upgrade Route
Drag Drive Simulator free upgrades show up in event windows, daily login streaks, and the anomaly badge ladder, and they let you unlock pipe tiers you would otherwise have to grind for. Players who stack these free routes into their build plan reach the Racing pipe tier roughly 20-30% faster than pure grinders, according to community estimates. The Drag Drive Simulator vehicle customization on Roblox page lists current event tags, so check the in-game news before you spend Robux on a Pipe you might earn for free the following week.
Common Customization Mistakes and How to Avoid Them
Every Drag Drive Simulator vehicle customization newbie hits the same five traps: painting before picking a pipe, wrapping over a paint they later regret, chasing the loudest pipe for an anomaly route, ignoring the Indicator slot, and never saving a stock configuration as a fallback. The fifth trap is the silent killer — once you have over-modified a vehicle, you cannot easily return to the stock look without remembering every original choice. Most experienced players keep one vehicle fully stock at all times so they can compare new builds against the baseline.
Mistake 1: Chasing the Loudest Pipe for Anomaly Hunts
The Racing pipe is the loudest in the catalog, and the temptation to use it everywhere is real, but anomaly arrival chimes are quiet by design. If you ride a Racing-pipe Aerox through the anomaly route, you will hear the exhaust crackle over the chime and miss the catch window. The Drag Drive Simulator best exhaust for anomaly routes is actually the Stock or Street tier, which is counterintuitive but mechanically correct. If you are also picking up event tokens, the Independence / Merdeka Event 2026 Full Quest Tutorial by Rylox is a useful reference because it shows the quiet-bike approach for event routing.
Mistake 2: Painting Before Picking a Pipe
Paint resets cost real in-game currency, and they are the single most wasted resource in the customization economy. Always pick the Pipe first, then paint to match. If the Pipe is loud, the paint can be clean; if the Pipe is quiet, the paint can be loud. Locking the mechanical slot before the cosmetic slot protects your wallet.
Mistake 3: Forgetting the Wrap Layer Order
The Wrap slot sits on top of the Paint slot in the visual stack, which means a heavy wrap can hide your paint. Pick the Paint you actually want to see, then choose a Wrap that complements rather than covers. If you cannot decide, skip the Wrap entirely — a clean Paint with a loud Pipe reads as confident, and a busy Wrap with a quiet Pipe reads as over-designed.
Mistake 4: Skipping the Indicator Slot
The Indicator slot is purely visual, but synced Indicators across a fleet of vehicles is what separates a serious builder from a casual tinkerer. Most players ignore it because it does not change performance, but a custom Indicator pattern is the cheapest way to make a build feel finished. Spend five minutes here and the whole vehicle looks more cohesive.
Mistake 5: Not Saving a Stock Reference
Keep at least one vehicle fully stock. When you are six Pipe swaps deep and you cannot remember which build you actually liked, the stock reference is your baseline. Most builders who skip this step end up cycling through every catalog option and never settling, because they have no anchor to compare against.
Building a Long-Term Customization Plan
A long-term Drag Drive Simulator vehicle customization plan should map to your driver level, your job rotation, and your event calendar. The plan below is a 30-60-90 style outline that you can adapt to your own grind pace, and it folds in anomaly hunts, RideGO shifts, and ranked drag climbs so every garage session has a clear next step. Players who follow a layered plan reach the Racing pipe tier with money left over for the visual layer, while players who wing it usually end up resetting Paint three times and never unlocking the Sport pipe.
30-Day Plan: Foundational Pipe Swaps
-
Week 1: Run Stock pipe, learn the launch feel on your starter vehicle.
-
Week 2: Swap to Street pipe once Driver Level 8-12 unlocks it; keep one vehicle stock as a reference.
-
Week 3: Test Sport pipe on a single vehicle, compare launch and wheelie behavior vs Street.
-
Week 4: Decide whether Racing pipe suits your playstyle; if yes, lock it in; if no, stay on Sport for daily play.
60-Day Plan: Visual Layer Stacking
-
Month 2 starts with your mechanical slot locked.
-
Add a clean DRL color that matches the Pipe tier — white for Racing, blue for Sport, amber for Street.
-
Pick a Paint that complements the DRL, and skip the Wrap layer for the first round.
-
Add a Rim upgrade on one vehicle to test stance and ride height together.
-
Sync the Indicator on every vehicle in your main rotation.
90-Day Plan: Event Pipe Collection
-
Month 3 is when event pipes start mattering. Each seasonal event — Independence Day, Halloween, Winter, New Year — typically introduces a unique Pipe that you cannot get outside the window.
-
Stack these event pipes into a dedicated collector build so your daily driver stays clean.
-
Cross-reference the event calendar on the official Roblox page so you do not miss a window.
-
By the end of 90 days, you should have at least one Racing-spec daily, one Stock reference, and one event-themed collector.
Frequently Asked Questions
How do I unlock more exhaust pipes in Drag Drive Simulator?
Pipes unlock as your Driver Level climbs, with the Street tier showing up around Driver Level 8-12, the Sport tier around 15-20, and the Racing tier around 22-30, based on community reports. Event pipes come from limited-time seasonal windows like Independence Day and Halloween. Daily login streaks and anomaly badge progress can grant free Pipe unlocks, so check the in-game news tab before spending Robux on a tier you might earn for free.
What is the Drag Drive Simulator best exhaust for drag racing?
The Racing-tier pipe is the strongest Drag Drive Simulator best exhaust pick for pure drag racing because of the sharper top-end pull and the wheelie bias. The Sport pipe is the smarter choice for lighter commuter motorcycles because it keeps the front wheel planted and still delivers a meaningful 0-60 improvement. Test both in a private server before committing in Ranked Mode.
Can I save multiple Pipe configurations on one vehicle?
The Pipe slot is a free swap, so you can rotate configurations in seconds, but the game only stores one active Pipe at a time per vehicle. Most experienced riders keep their daily driver on one tier and rotate to a second tier only for specific event routes or ranked runs. A common pattern is Racing for the strip, Sport for daily play, Stock for anomaly hunts.
Does the Pipe slot affect speed or just sound?
The Pipe slot affects both. Community testing on the Yamaha Aerox and the Stylo 160cc shows measurable launch and top-end differences between tiers, and the Racing pipe is the most mechanically aggressive. Sound is the most obvious change, but the launch behavior, the burnout feel, and the wheelie tendency all shift with the Pipe you select, so it is a real performance slot, not just a cosmetic one.
How do I reset my customization if I do not like a build?
The Pipe slot is free to swap, so resets there cost nothing. Paint resets cost in-game currency, which is why the community recommends picking Paint last, after you have locked the Pipe and the DRL. Wraps are usually one-time purchases, so changing a Wrap usually means buying a new one rather than resetting the old. The cheapest reset path is always to test a new Pipe in a quiet area first and only commit to Paint and Wrap after you are sure about the mechanical core.